Hero with Anchor Links
Help users quickly locate relevant information
Short and simple heading
Explain why users should explore the page within ten words
Overview
Help users quickly locate relevant information
Hero with Anchor Links is a useful tool for people on the hunt for certain information. This is because it allows users to jump to specific sections of the same page.
Hero with Anchor Links is a good option when a page has clearly demarcated sections, helping users proactively search for the information they need. The anchor links are displayed as a table of contents within the hero banner.
How to use it
Step 1: Create and save your page
When you save a page, individual components generate a unique code called a Section ID. You’ll need these to make your anchor links. So it’s best to start building your hero with anchor links at the end of the process.
Step 2: Add your heading to the hero
Your heading – the H1 – must be the same as your page title (not to be confused with the SEO title). This might be a product, sector, or headline.
Headings must not occupy two full lines in this component, as it reduces readability. Use a maximum of 25 characters.
Don’t use the hero banner more than once; having a single H1 per page is a fundamental SEO principle.
Step 3: Add your subheading
Add an optional subheading to support your heading with an aspirational or complementary message. You have some flexibility here, but your subheading should contain no more than 10 words.
Step 4: Build the call to action buttons
You can have up to two call to action buttons (or none, if you wish).
Connect your form
First, you need to have an appropriate form to direct users to.
Use the ‘URL’ text field to attach your form. You can either:
- Type the name of your form into the text field and select it from the dropdown menu
- Copy and paste the form URL directly into the text field
Add your button text
Next, your buttons need some call to action copy – a short, actionable phrase which encourages users to click on the button. Use the ‘link text’ field to add your button copy.
It’s important to use button text that describes the action you want users to take. Good examples include:
- Get in touch
- Get a quote
- Request a quote
- Start assessment
- Contact us
- Book a demo
- Register your interest
- Read more
Step 5: Add the anchor links
The anchor links are made up of two text fields: the URL and the link text.
URL
Each component generates a unique Section ID (found at the top of the component in edit view). It looks like this:
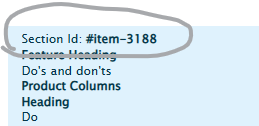
Copy and paste the code #item-XXXX (it is usually a four digit number) into the URL field – that’s your ‘anchor’.
Link text
Copy the subheading to which the link leads and paste it into the link text field. That’s your anchor link.
Make sure that your link text exactly matches the section’s subheading. This reassures users that they’re in the right place.
Recommended image specifications
| Format | Orientation | Dimensions | File size |
| JPG | Landscape, Square (Private Clients theme) | 1200 x 500px, 600 x 600px (Private Clients theme) | <150kb |
For more information about uploading images to the CMS, see the ‘Image basics’ advice.
Do's and don'ts
Do
Test your anchor links before publishing
Check that your anchor links work and go to the right place.
Don't
Don’t repeat your heading
Your subheading should complement the heading rather than repeat it.